브랜치는 독립적인 개발을 가능하게 해줍니다.
그림을 보며 브랜치를 관리하는 방법에 대해 알아봅시다!
git branch testing
먼저 testing이라는 새 브랜치를 생성하면,
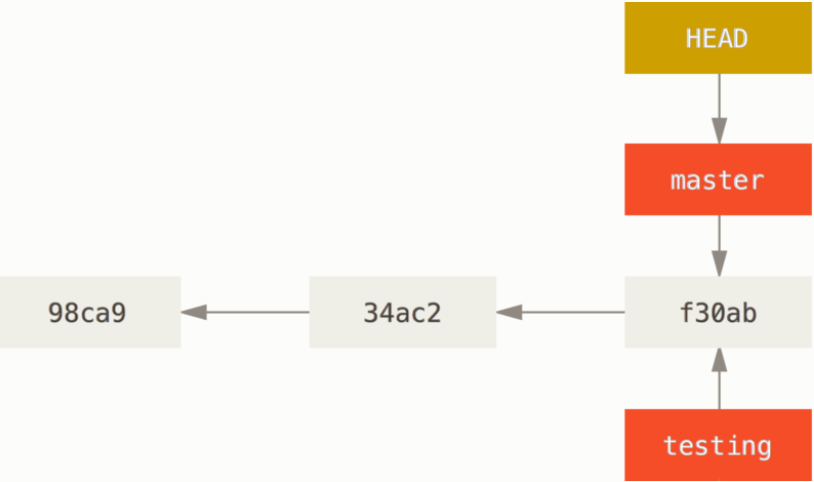
새로 생성한 testing 브랜티도 마지막 커밋을 가리키고 있습니다.
HEAD는 현재 작업중인 브랜치(master)를 가리키는 포인터입니다.
git checkout testing
명령어를 입력하면, HEAD가 testing 브랜치를 가리키게 됩니다.
1. Merge
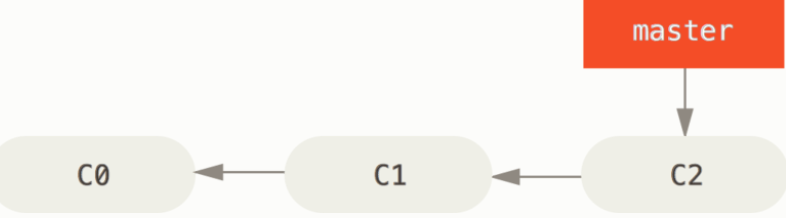
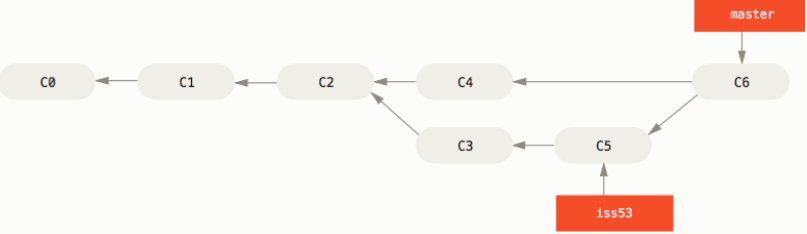
위의 그림이 초기 히스토리라고 가정해봅시다.
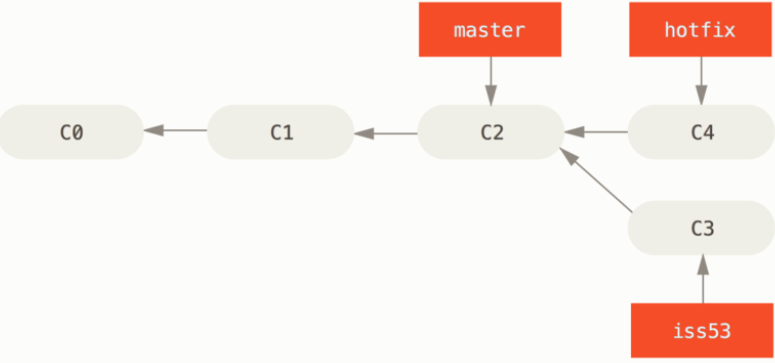
이후 master 브랜치에서 iss53 브랜치와 hotfix 브랜치를 생성하고, 각각 하나의 commit을 하면 히스토리가 위의 그림처럼 됩니다.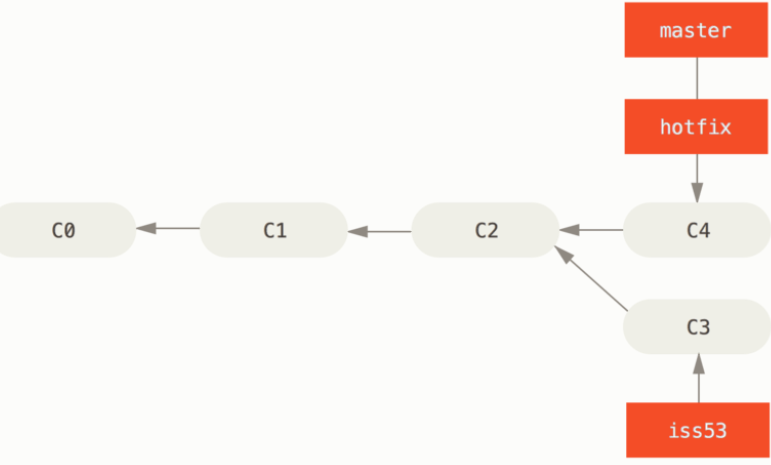
출처: git-scm (Git 브랜치)
hotfix 브랜치를 master 브랜치에 합치는 것은, 현재 브랜치 포인터가 merge할 브랜치의 조상을 가리키고 있으므로 별도의 commit 없이 Fast Forward merge가 가능합니다.
출처: git-scm (Git 브랜치)
-
 (별도의 commit을 생성할 수는 있다.)
 git merge --no--ff hotfix
- hotfix 브랜치를 merge 했다면 해당 브랜치를 삭제합니다.
-
git branch -d hotfix
iss53 브랜치를 master 브랜치에 합치는 것은, 현재 브랜치 포인터가 merge할 브랜치의 조상을 가리키고 있지 않으므로 commit을 생성하여 3-way Merge가 가능합니다.
2. Rebase
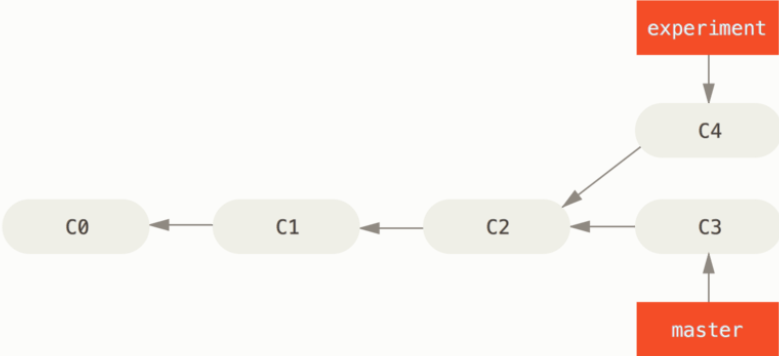

3-way Merge로 merge를 했어야 합니다.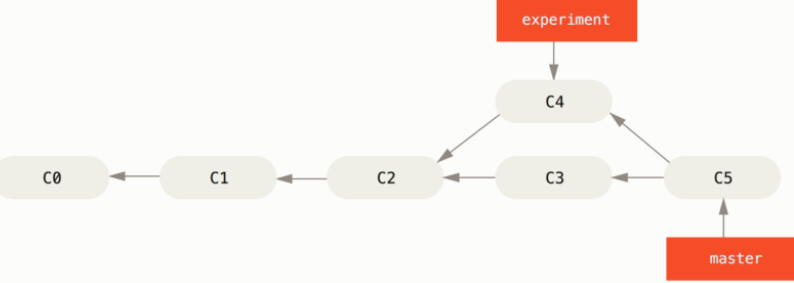
출처: git-scm (Git 브랜치)
출처: git-scm (Git 브랜치)
출처: git-scm (Git 브랜치)
Reference
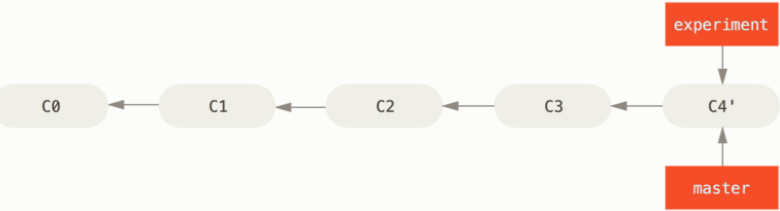
하지만 이를 Rebase 방식으로도 합칠 수가 있습니다.
git checkout experiment
git rebase master
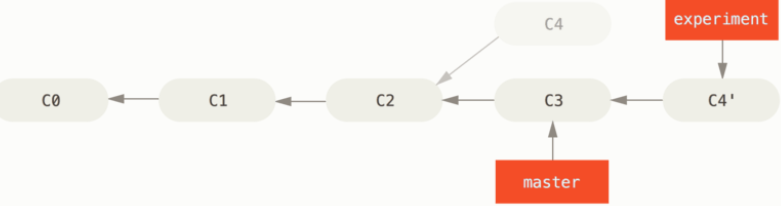
위의 명령어를 실행하게 되면, C2(두 브랜치가 나뉘기 전의 commit)로 이동한 후, 해당 commit부터 C4까지의 commit 사이의 diff를 만들어 C4'에 저장합니다.
git checkout master
git merge experiment
이후, 위의 명령어를 실행하면 Fast Forward로 merge할 수 있습니다.
- Merge와 Rebase는 최종적으로 결과는 같지만, commit history에서 차이가 있다.
- *주의! 협업을 하는 공개 저장소에 push한 commit을 Rebase하는 것은 위험하다.
Reference
'정리' 카테고리의 다른 글
| [Logging] Logback이란? (0) | 2022.08.26 |
|---|---|
| OAuth 2.0 인증 과정 (0) | 2022.07.10 |
| [Test] Test Double (1) | 2022.05.26 |
| [Git] git 영역 및 상태 (1) | 2022.02.14 |